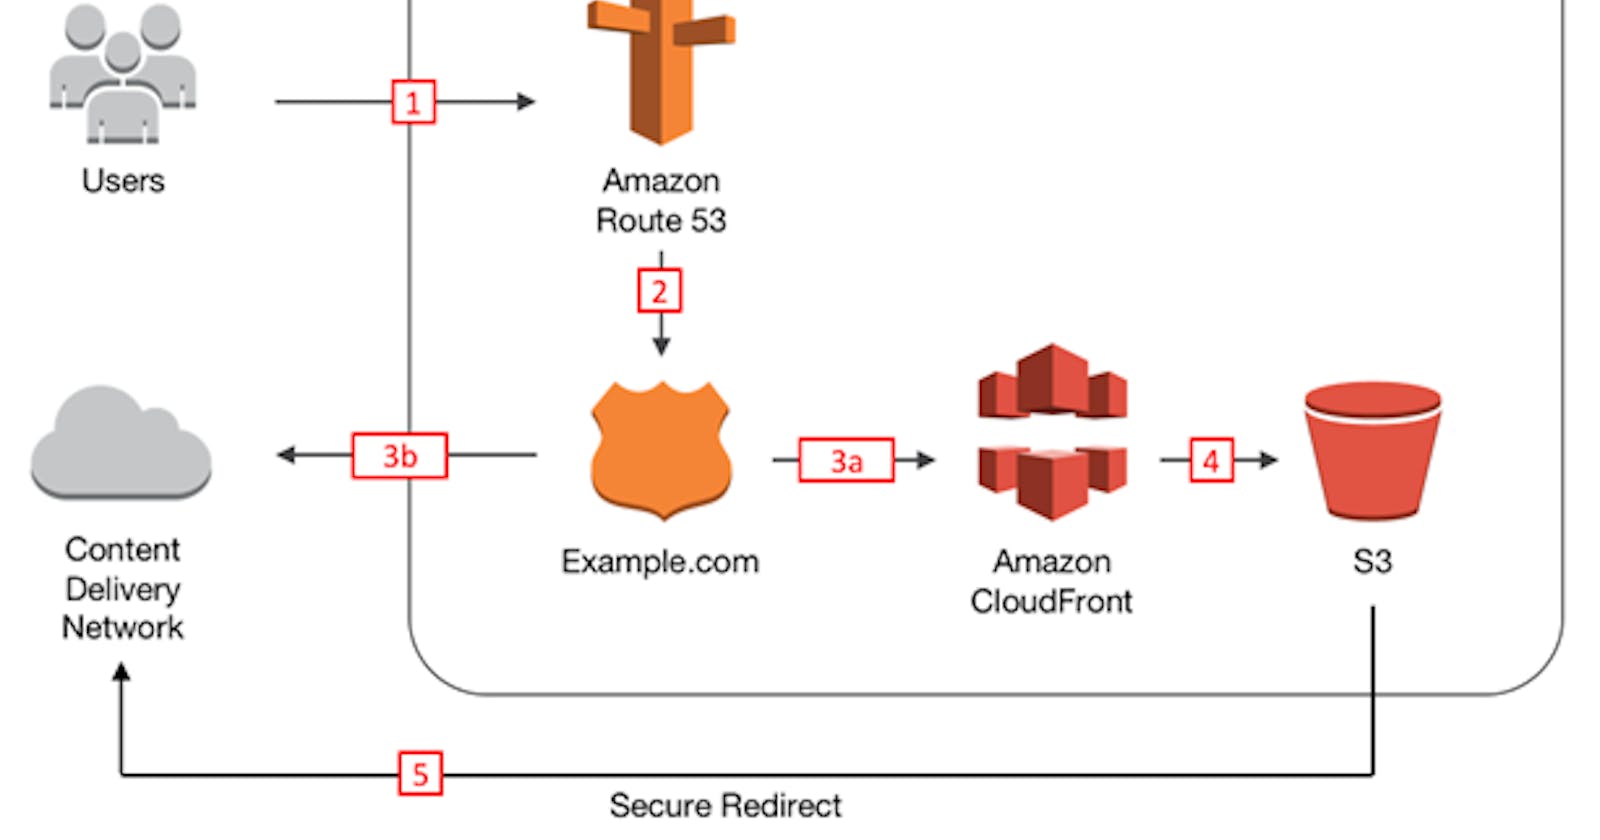
Deploy a Nodejs and React app on AWS with AWS S3 and Ec2 (Part 2)
Cloudfront and Route53 integration
What is CloudFront?
CloudFront is Amazon's global content delivery network (CDN). It's a network of servers called edge locations all around the world that actually cache your content (images, videos and of course static websites) and serve it to users who request it. With cached content, the delivery is lightning fast and when using CloudFront, static websites can utilize HTTPS.
Creating Distributions
Distributions tell CloudFront where your content will be delivered from. For the most part, we are sticking with the defaults, and we will go over everything that is needed.
We will be creating two distributions. One for the www domain and one for the non-www domain. Both will use the same instructions below.
To create distributions:
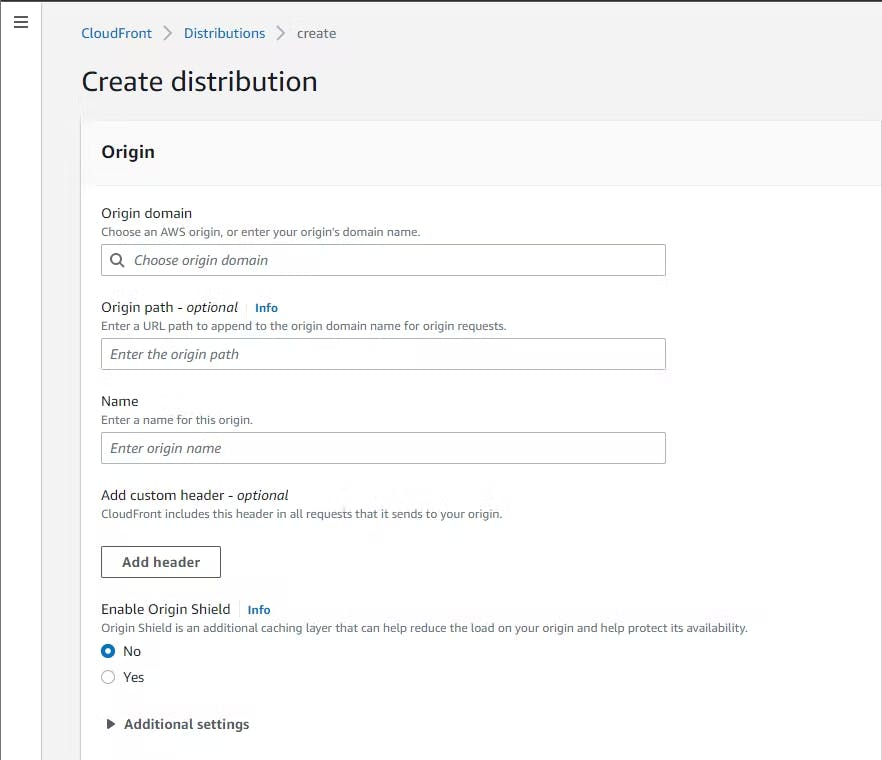
On the CloudFront console, in the "Distributions" page, click on the "Create distribution" button.

In the "Origin domain" field, Amazon's autofill may show you incorrect origin domains. To ensure that you add the correct one, we will get the domain from an S3 bucket. Open a new tab with the S3 console open and select the www domain bucket. Go to the "Properties" tab, scroll all the way down and copy the domain at the bottom of the "Static website hosting" section. Paste the domain into "Origin Domain".
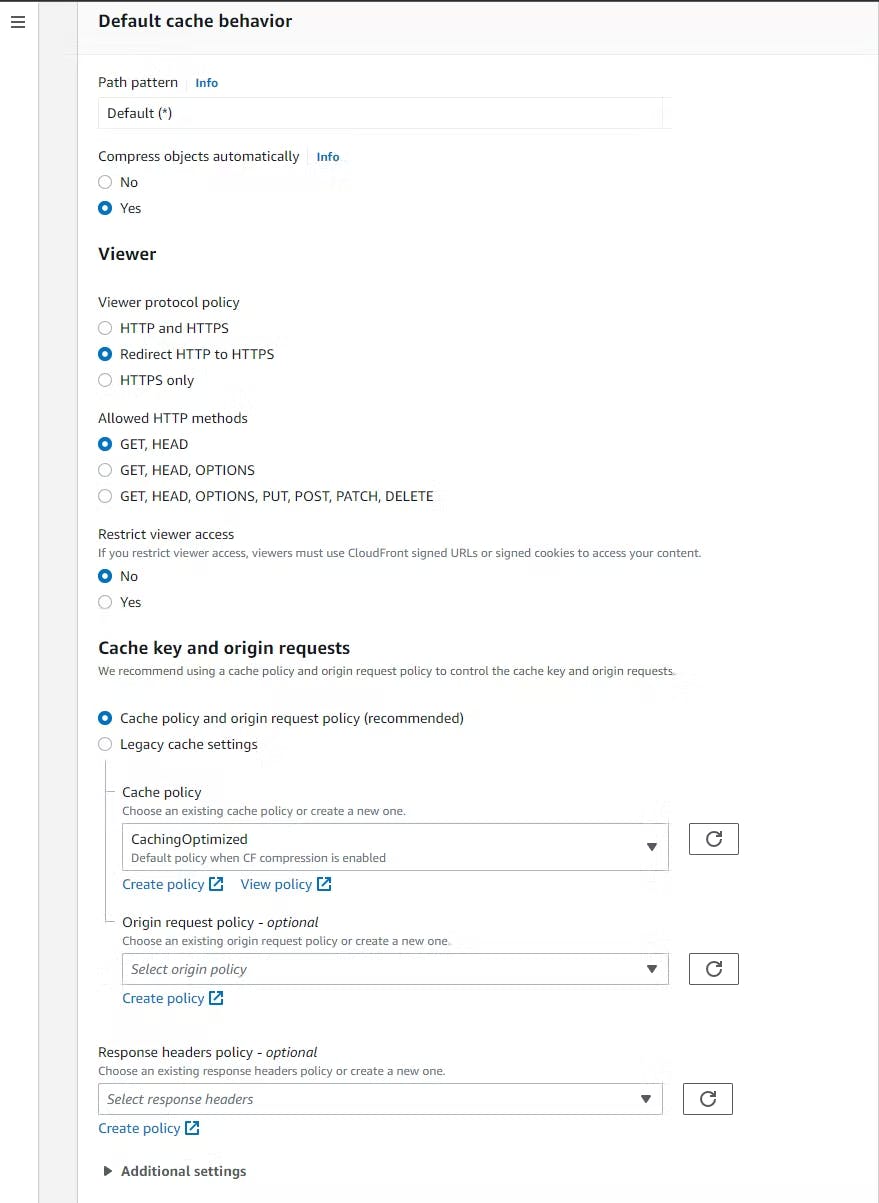
Select Redirect HTTP to HTTPS. Leave all other setting in the "Default cache settings" section to their defaults.
Enter your www domain into "Alternate domain name (CNAME)". Select "Custom SSL Certificate" and it should autocomplete the certificate you created. Leave all other settings to the default and click "Create distribution".
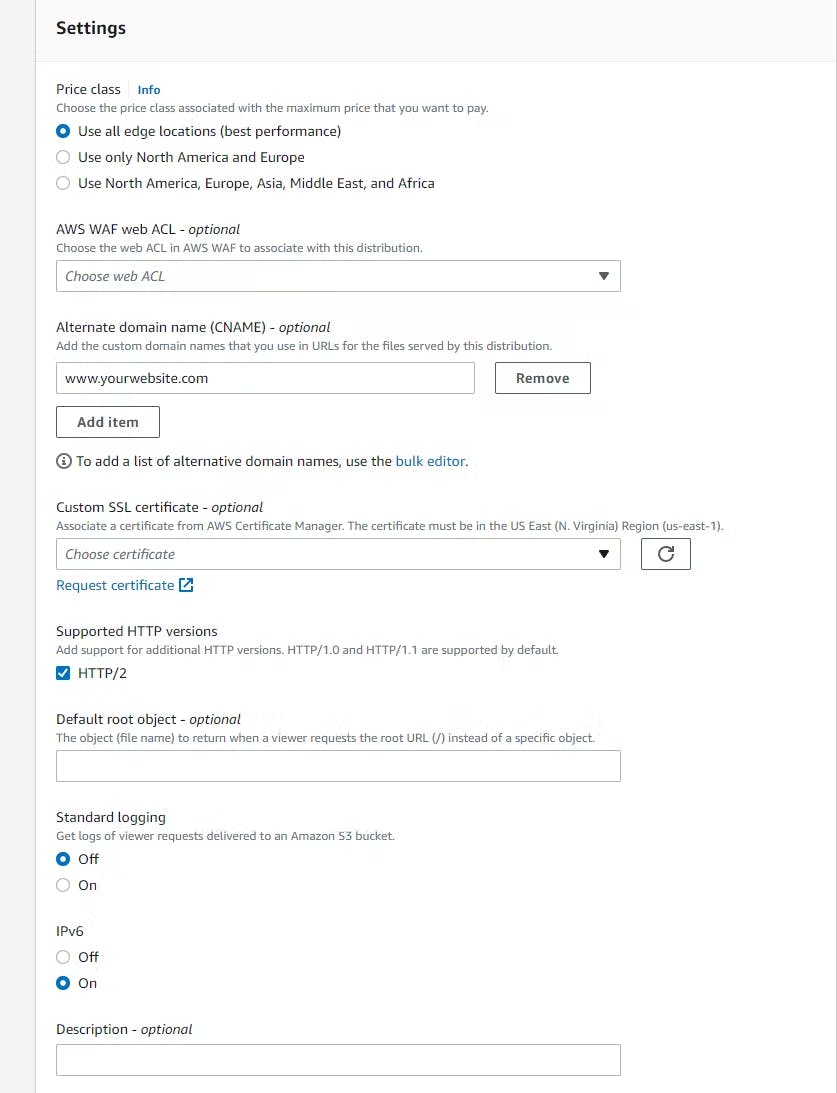
Repeat these steps, but for the non-www domain. Check the Distributions home page and ensure that the state is "Enabled". This may take a few minutes.
Adding the Distributions to Route 53
Now that you have both of your CloudFront distributions up and running, we need to replace the "A" records, so they point to your distributions.
In Route 53, click the checkbox next to the record that is type "A" and is your www version. Then click "Edit record".

Change the "Route traffic to" selection to "Alias to CloudFront distribution". For the "Choose distribution" field, there should be one auto filled option available. Click that and save the record.
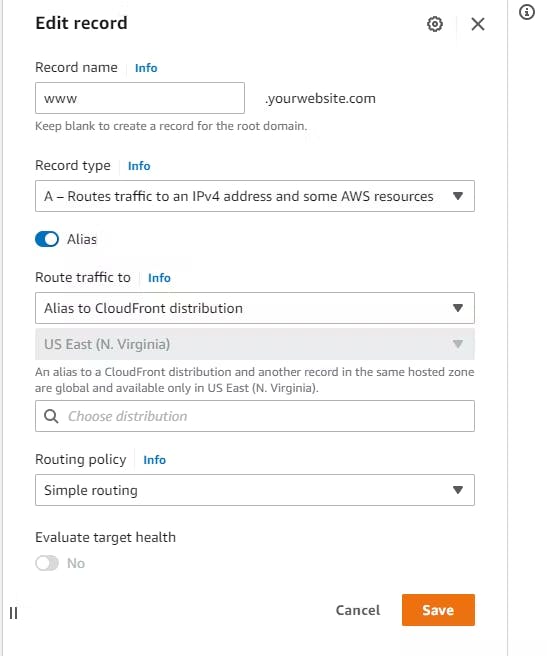
Repeat these steps for the type "A" non-www record.
Thats a wrap! Go ahead and type your domains into your search engine. You should see that you have "https://" in front of your domain, and if you typed in your non-www domain, it should redirect you to the www version.
Disclaimer: After writing part 1 of this article, I got too lazy to complete it :) and abandon it for months. Looking at the article in Aug 2022 I discovered i had not completed it and also got lazy to do the whole process all over again and make screenshots. So i had to get all of the information on this article from Dathan Stone. You can find the original article here. Do well to follow him, he has other great articles
